Thursday, April 26, 2012

Recipe: sweet potato fries

*Note: strictly speaking, this post is not vintage, but it does contain anecdotes of my childhood, which at some point will count as vintage. Hopefully later than sooner.*

I remember these mystical summer evenings from my childhood in the Pacific Northwest when the air was heavy and the sun hid behind the silhouetted evergreen trees, not quite ready to say goodbye to the day. Memories tinted with the sound of crickets, playing outdoors with my siblings and our dogs until it was too dark to see where the volleyball went, and a favorite snack when we finally went in at day's end...

This snack, sadly, was not usually sweet potato fries. In fact, in one instance it was an entire gallon of rainbow sherbet ice cream previously thawed and refrozen - the result of lost power at some time or other. Ah, such happy memories, sugar-high and brain-frozen in the midnight hours.

But I digress. Lately, I have returned to my home climate and was surprised that a summer night detached itself from July to visit us in late April, so I just had to celebrate. Our penchant for wine on long, lingering summer eves (indeed, on many evenings of the year) necessitated a wine run, during which I decided to make something to accompany our favored beverage. 

One finds it very difficult to decide between sweet and salty when one is anticipating mystery wine. But I found I didn't have to choose - sweet potatoes can be both! Here is my adjusted recipe (originally from here), and I encourage you to try this easy dish when premature summer nights entice you to make an evening snack.

Ingredients:
  • 3 large sweet potatoes (or yams, which are on the sweeter side)
  • 1/4 cup (ish) olive or canola oil
  • 2 tsp. salt
  • 2 tsp. sugar
  • 1 tsp. cinnamon
  • 1 1/2 tsp. cayenne pepper
  • 1/2 tsp. paprika
You'll also need:
  • Baking sheets and aluminum foil
  • Mixing bowl and spoon
  • Large knife and cutting board
  • Cute kitchen apron and matching oven mitts (or similar accessory)

1. Preheat the oven to 450°F.
2. Peel the sweet potatoes and cut them in half twice.

3. Cut them up to your own preference - I like them to look like French fries.

4. Put them in a bowl (you may have to do this a few times - it's rather a lot of sweet potato) and add some oil. Mix until it coats all the fries.

5. Add the sugar, salt and spices and mix well.

6. Cover a baking sheet with aluminum foil. Your husband will thank you when he doesn't have to spend an hour scraping burnt sugar off the inside of it.

7. Place the fries on the baking sheet. If you want each one crispy, put them only one layer deep and give them space. If you like them softer or less evenly crispified (I do!) then pile them on as I did.

8. Bake for 15 minutes, pull them out and turn them over, then bake for another 10-15 minutes.

9. There! They look lovely. Enjoy alone (but definitely with other people!) or with ketchup or parmesan or whatever you like to put on fries.


If you really think these are wonderful, try making poutine out of them. I have yet to do this, but I have heard it is most fabulous. I did find a recipe here that I plan to try sometime soon.

May your all summer evenings be full of such mouth-watering delicacies,
Marjorie

Sunday, April 15, 2012

Titanic Tea: centennial commemoration

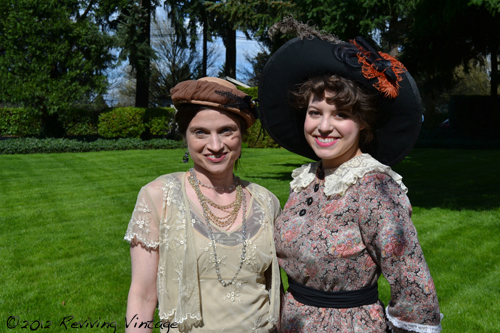
The Titanic Tea at the Grant House on Officer's Row was a delightful affair, full of glamorous hats and duds, and even more glamorous people!

Caley and I got a chance to meet Julie (Fab Gabs) and Rhiannon (Garb-oh Vintage) - two ladies with impeccable taste and even more impeccable. It was also a delight to fraternize with new friends and kindred spirits Janey (Atomic Redhead) and Solanah (Vixen Vintage)!

After tea and photography in the garden around the Grant House, we walked along Officer's Row, eye candy for the favorable passersby. And sad as it is to recognize the loss of so many lives in the Atlantic that night a hundred years ago, we could not help but celebrate their memory with fancy ensembles and warm smiles, as the day greeted us so amiably. What wonders blue sky and sunshine can do!

~ all thrifted, with help from several friends ~


~ the lovely Caley in her totally-thrifted Edwardian tea ensemble ~

~ one event photog to another! ~

~ we even had a dapper man in real Edwardian tails! ~

~ Lisa and Solanah ~

~ Lisa in her lovely fur coat. I couldn't get enough of her outfit! ~

~ Janey walking like she owns this town... and so she does! ~

~ take a close look at Rhiannon - a creative and youthful sailor outfit, complete with 1920s doll! ~


~ in the gazebo on the green - and we look as if we're about to embark! ~


~ a most charming couple! ~

~ so photogenic! Julie is a vision in blue and white ~

Many thanks to Solanah for hosting this event! It was a fabulous time, well worth the drive and ensuing mishaps.

Cheers!
Marjorie

Dress-ups: vintage nightgowns

Yesterday brought adventure after adventure for my friend Caley and me as we traveled to Portland and back for Solanah's Titanic Tea event at the Grant House on Officer's Row. From getting stranded in downtown Portland at dusk (by the Max, no less!) to running out of gas a mile short of our destination, the weekend has been satisfyingly memorable.

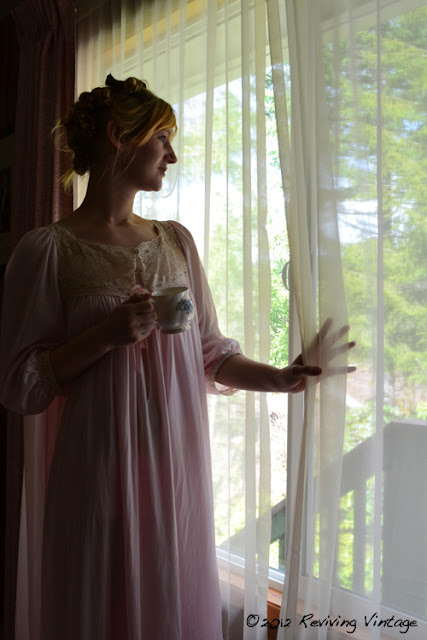
We arrived Friday night after an exhausting drive with a few wrong turns, and soon slipped into our vintage nightgowns to relax. Our thoughtful hosts served us tea on a tray and we watched Peter Pan until the early hours of the morning. After a lazy breakfast and sunshine and more tea, we rolled up our hair and took advantage of the romantic atmosphere of the house before preparing for our Titanic event.

I always think this is the stuff of fairy tales, and as I frequently tell my dear mother-in-law, no, I will never grow up. I will always be the right age for playing dress-up and learning useful skills like embroidering. There is simply nothing like falling asleep in something pretty and feminine - except, perhaps, waking up in it.

Our morning photoshoot for your enjoyment ~


Check back soon for other frivolous hobby exploits! 

Cheers,
Marjorie

Saturday, April 14, 2012

A little precursor: Victorian Tea

Some months ago, I had the opportunity to drag my dear mother-in-law to a Victorian-themed tea party while she was visiting our new town. I foolishly brought only my cell phone to take pictures with, so I wasn't able to capture it in detail. However, I was able to memorialize the beautiful decor in a small way, if only to add it to my Pinterest ponderings for future interior decorating ventures.

Some local teens also offered us a stunning fashion show of Victorian-style ensembles as we enjoyed our tea and cakes throughout the afternoon.

I look forward to more such tea and assorted apparel at the tomorrow's Titanic Tea at the Grant House with Solanah &c. Check back for more photos soon!


Such a delightful spread - cucumber sandwiches and delicious sorbets!

A beautiful steamer trunk full of fancy goodies!

Oh, to have a nook like this for my piano!


By far the most beautiful hat I have ever laid eyes on!


Cheers!
Marjorie

Saturday, March 31, 2012

Make it sew: decorative centerpiece

Having recently acquired a magnificent sewing machine, I've been anxiously toying with ideas about what to create as my first piece. I have great costume patterns, but I must admit I don't have the experience to succeed or the courage to fail as I just begin to use this beautiful machine (named Agnes, for reasons unknown).

After two weeks (I know!) of bumbling around with no patterns or material, I figured maybe I could make up my own. So off I went to the thrift store and came home with some patterned scraps left over from someone else's probably-way-more-fabulous project. I folded some printer paper, cut out what later turned out to look like lips, and sewed it all together with extraordinary cleverness. I have yet to devise a plan for creating fabric flowers, but never mind. One success at a time.

Today I have recreated this masterpiece in a similar pattern step by step to show you. Because anyone with fabric and a needle and thread is clearly in want of a decorative centerpiece on which to exhibit flowers and a natural sewing talent. (You don't actually need natural sewing talent, but a sewing machine helps to fool people.) The great thing about this project is that you can do it with or without a sewing machine, and with or without great amounts of sewing experience.

Here's what you'll need:

15" x 24" sheet of fabric (or two 12" x 15" sheets)*
Pencil 
One 8.5" x 11" sheet of paper*
Ball-ended knitting needle (or long pencil)
Thread (spool and bobbin if machine sewing)
Needle 
Sewing machine (optional)
Fabric shears
Pins
Iron and ironing board


*If you want to make one twice as large, use two sheets of fabric at least 25" x 30" and tape two sheets of paper together.


1. Start by ironing your fabric flat.

2. Fold the sheet of paper in half twice (until it's 4.25" x 5.5"). Draw a simple design on it in such a way that when you cut it out, it will be a single piece (not four!).

3. Cut out the design.

4. Unfold the paper to make sure the design is what you want. It should be completely symmetrical. Adjust if needed. I recommend not making it too scalloped or it will be hard to shape later (these scallops were hard enough!).

5. Fold your fabric (or place your fabric sheets) pattern-side together.

6. Use pins to secure your homemade pattern to both sheets of fabric. Give the pins at least a 1/2" margin from the edge for when you're sewing it.

7. Cut out the design. Give yourself a good 1/2" margin for that as well.

8. Sew a seam along the edge of the pattern. You can do this with a sewing machine or by hand. If by hand, I recommend using the backstitch technique to avoid gaps and to strengthen the seam.

9. Take the pins out as you go along. It's ok to sew over the paper because you can pull it out later, but try to keep as close to the edge as possible to maintain the symmetry and uniformity of the piece.

10. Leave a gap a little wider than your thumb without a seam. You'll use this to turn the piece inside out. If you do sew around the pattern completely, use a seam ripper to create about a 1" gap.

11. Check the pattern when you're done before removing the paper pattern entirely. If there are places that are far off the pattern, don't be afraid to use a seam ripper to pull out the stitch and redo it (I had to do that for the shoddy seamline you see below).

12. Peel the paper off the fabric - make sure to get all the little bits out from under the seam.

13. Cut out the corner of the extra fabric near the points so that when you turn the piece inside out, the fabric on the inside doesn't create an unsightly bunch on the outside.

14. Push the fabric inside out through the gap using a ball-ended knitting needle (or something with a strong thick end - even a pencil would work, just not the pointy end).

15. Pull the rest of the fabric through by hand once you've gotten some fabric through the gap.

16. Push the pointed end of the pencil or knitting needle into the pointed end(s) of the fabric to define the point (be careful that you don't poke through the fabric).

17. Use your forefinger and thumb to work the edges out, especially in areas where the seam is rounded. You won't see definition to the scalloped shapes if you don't work the fabric out to the seam.

18. Fold the ragged edges into the gap.

19. Iron, iron, iron! Flatten the piece into the shape you want it - all the seams, curves, points, and the gapped edge. Be ruthless.

20. Thread your needle and sew up the gap now that it's flattened into place. Make the stitch invisible by sewing just on the inside of the gap.

21. Survey your work. If any curves or points in the design fail to make their presence known, the iron can help. And it's ok to turn it back inside out and pull some seams. To be honest, I got fed up and actually threw this project away halfway through because I did a rotten job the first time, but in the end I pulled it out of the bin and tried again. Practice makes perfect!


You're done! If you want to leave it as it is, it makes a lovely centerpiece, especially with flowers or some other decoration on top. A perfect Easter centerpiece!


Look for my next post on embroidering this piece soon. We'll give definition and personality to this decorative centerpiece. 


If you try this project, I hope you'll post a comment or email me and tell me how it went!

Cheers!
Marjorie